Regardless of how much time you actually spend at a computer every day, it’s hard not to get addicted to the ‘thock-thock-thock’ of creamy mechanical keys. While keyboard technology has advanced leaps and bounds since the days of beige-coloured IBM models, the prevalence of laptops has largely eliminated the need for a separate typing apparatus. But if you’re ready to get back into a more tactile typing experience, it’s time to enter the wonderful world of custom mechanical keyboards.
The true beauty of returning to these nimble clackers is the fact that your machine can be tweaked to meet your personal ergonomic, stylistic, and auditory preferences. To make this transition easier, we’ve laid out a beginner-friendly guide to building your own custom keyboard – meaning that no screwdriver, soldering iron, or advanced technical knowledge is required. One clack, and you’ll be hooked for life!
Read More: Attention All Game Boys & Girls – Everything We Know About The Nintendo Switch 2
Jump To:
How To Build A Keyboard That’s Truly Yours
How To Build A Keyboard That’s Truly Yours
Step 1: Skip The Soldering & Start With A Barebone Kit
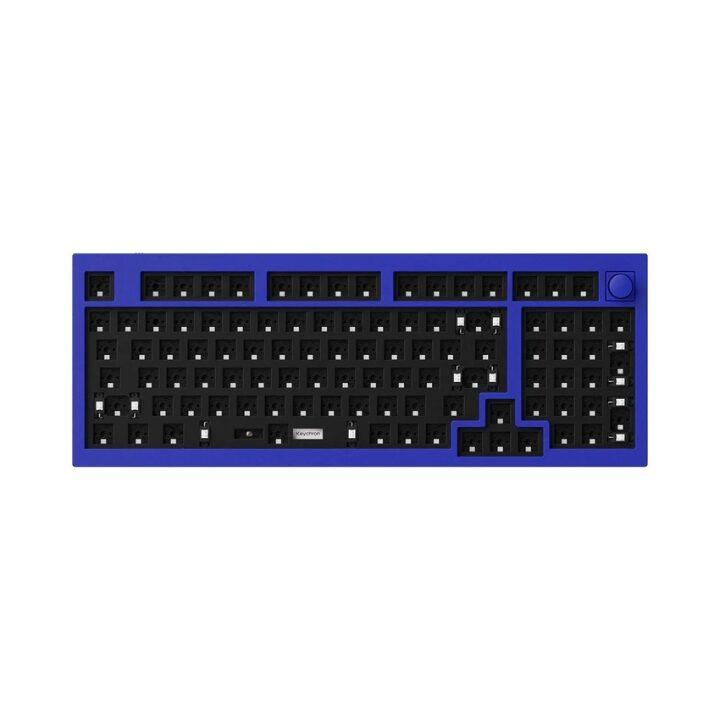
The simplest way to dip your toes into building a custom keyboard is finding a barebone kit – typically in the form of a plastic or metal base, devoid of switches or keycaps already assembled. What makes these kits particularly well-suited for beginners is the ‘hot-swappable’ feature, which allows you to add and remove your desired switches without the need for desoldering.
While several companies offer their own versions of barebone kits, some of the most convenient and user-friendly options can be found at Keychron. Offering fully assembled as well as barebone versions of almost all its models, Keychron boards come in full-sized (number pad and all) and more compact versions. These kits also thankfully come included with their own wires, so non-bluetooth users won’t have to go and buy connective cables separately. Plus, Keychron boards come with a handy toggle switch that allows you to toggle between macOS or Windows modes.
Step 2: Switch Things Up
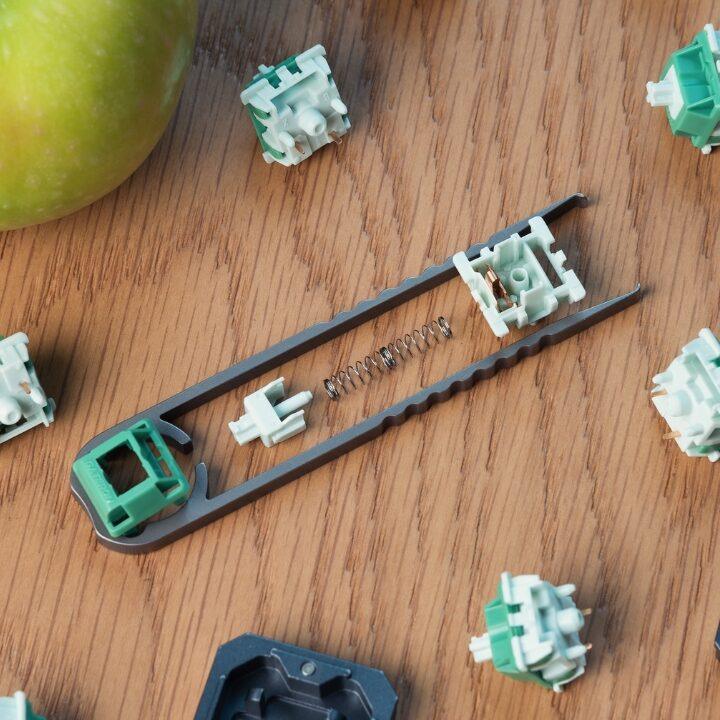
Before diving into the next steps, it’s a good idea to grab a switch-puller and a keycap-puller tool – both will come in handy as you customise your keyboard.
When it comes to mechanical keyboards, the choice of switch is arguably the most impactful decision you’ll make – it defines the entire typing experience. With so many options out there, it’s easy to feel overwhelmed. To simplify things, start by narrowing your choices down to the three main categories of switches:
1. Linear switches: Smooth and silent, these switches offer a straightforward press and spring-back with no tactile bump or audible click. Perfect for those who prefer a quiet, uninterrupted typing experience.
2. Tactile switches: These provide a noticeable bump and a satisfying ‘thock’ sound with each keypress. The weight of the bump and the volume of the sound vary depending on the specific switch.
3. Clicky switches: Delivering both a pronounced ‘click’ and a tactile bump, these switches are ideal for those who crave auditory feedback. Like tactile switches, the weight and sound levels can differ between models.
Once you’ve decided on a switch type, double-check how many switches your barebone kit requires (pro tip: buy five or more extras in case of damage). With brands like Gateron and Cherry constantly expanding their offerings, one of the best ways to choose is by ordering a switch tester first. This lets you physically press and compare different switches before committing to a full batch – a small investment that pays off big time. Installing your chosen switches into the barebone kit is as simple as snapping Lego bricks into place. Just make sure the pins slide neatly into their slots without bending. Take your time, and you’ll have your switches securely seated in no time.
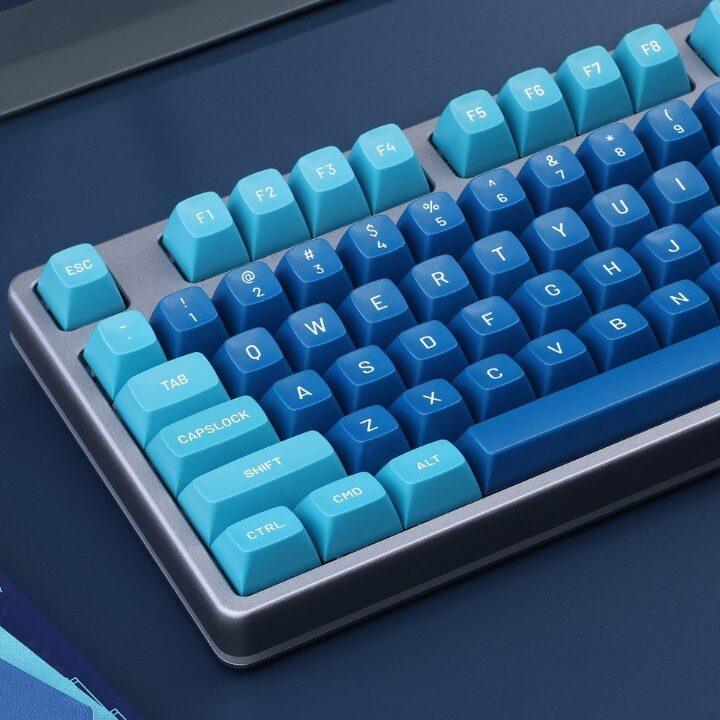
Step 3: Treat Your Fingers To Quality Keycaps
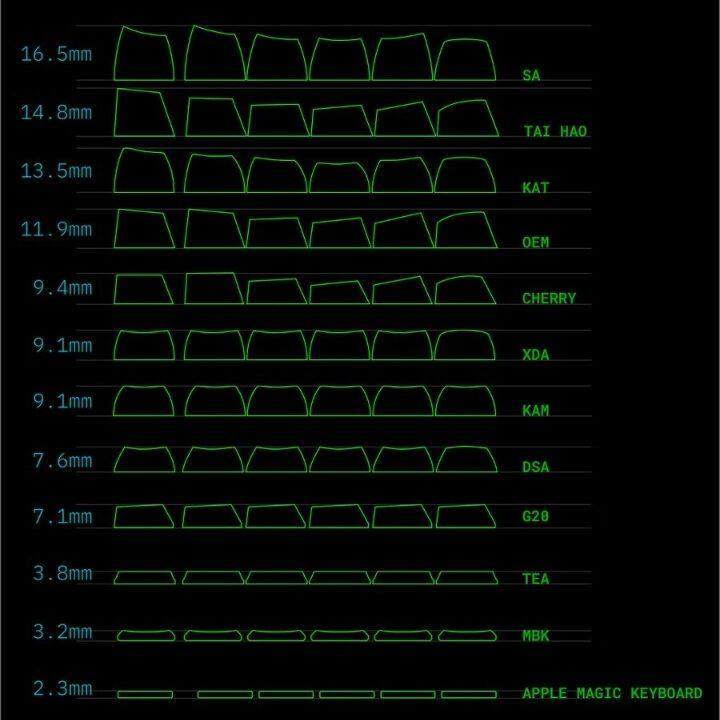
While most laptops feature flat, uninspiring keys, one of the finest parts of the mechanical keyboard experience is the satisfying tactile press of chunky keycaps. When choosing a keycap set, it’s essential to remember that you may end up typing with these keys for hours on end – making it vital that the set you select is comfortable and ergonomic. That being said, the different types of keycap profiles vary by height and sculpt, so it’s all about deciding how your fingers will feel moving across the board.
When it comes to purchasing keycaps, options abound at virtually every price point. If buying online, basic sets can be found on the cheap on platforms like Amazon or Taobao, while better made (but also more expensive) sets can be found from popular brands like Drop, Cannonkeys, Divinikey, and more. Just be sure to double-check compatibility between the keycap set and the switches in your keyboard to avoid any mismatched mishaps.
Step 4: Fine-Tune Under The Hood
After your barebone base is fully decked out with your custom switches and keycaps, you can connect it to your device – either via wire or bluetooth (depending on the capabilities of your keyboard base), and in theory just start typing right away.
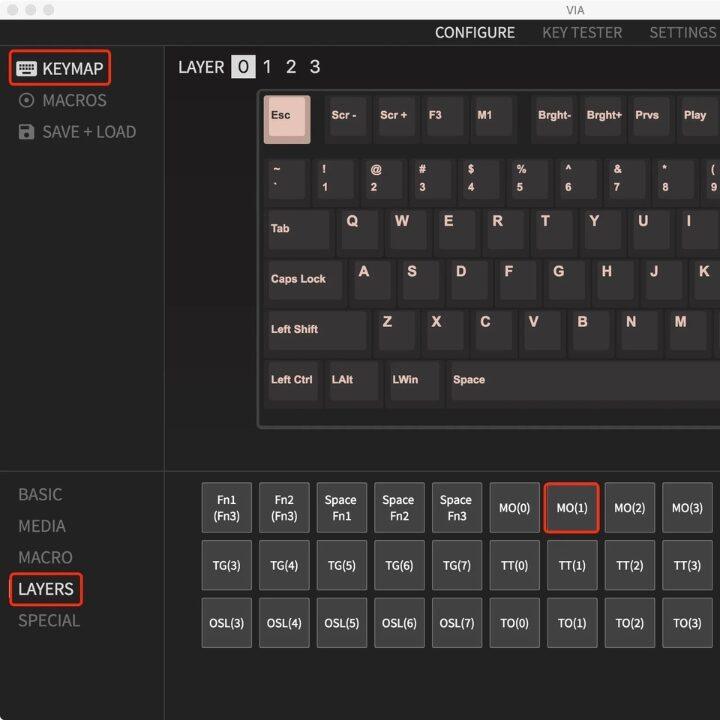
However, if there are certain keystrokes that aren’t compatible with your system – or just not in your preferred arrangement – most Keychron devices (as well as most other popular manufacturers) use the utility programme VIA to remap and fine-tune functions. Especially useful for online gamers looking to craft their ideal keystroke setup for optimal play, there are many ways for you to fine-tune your keyboard.
Pre-Built Picks
If you’re entering the mechanical keebs game but aren’t quite ready to build your own custom keyboard, there’s no shortage of fully-assembled options out there.
NuPhy: Excellent selection of mid-range models, as well as more intricate specialty designs.
Logitech: Great entry-level choices with a wide variety of models available.
Razer: A go-to choice for many looking for a gaming keyboard. Broad range of models available, including some tailored specifically for certain games – perfect for competitive play.
Royal Kludge: Slightly pricier but packed with personality, offering quirky, sleek, or retro-inspired designs that stand out from the crowd.
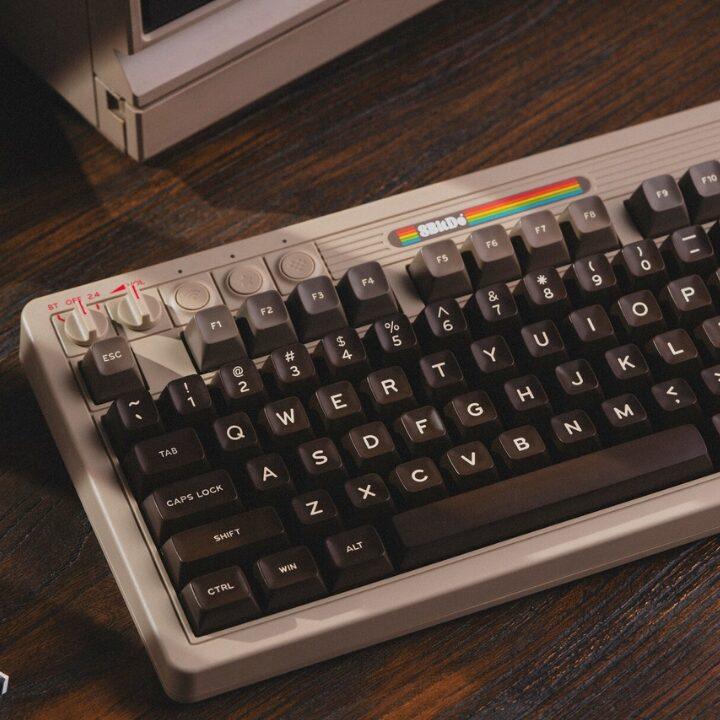
8bitdo: Excellent choice for classic, retro-looking models. Just keep in mind that many of their keyboards are Windows-only.
While you can always order directly from most brands, manufacturers, and artisans, heading to your local tech shop or computer centre is also a great choice for getting the feel of a board before purchasing.

Born in Korea and raised in Hong Kong, Min Ji has combined her degree in anthropology and creative writing with her passion for going on unsolicited tangents as an editor at Friday Club. In between watching an endless amount of movies, she enjoys trying new cocktails and pastas while occasionally snapping a few pictures.